Part 03: Controlling blogs using Git
At the end of last class you should have installed git, let us learn about git to controll your website locally!
Downloading git
First install git hereand keep clicking next, but remember to change the default branch to “main” not master, read the directions on each page carefully until the finish installing page. Right click anywhere and it look like this:

And you are done!
Initializing Git Config
1. Open a folder, and left click, choose Git Bash Here until it opens a command bash.
2. type or paste git config --global user.name "your_github_username_here" to set up your name
3. type or paste git config --global user.email "your_github_email_here" to set up your email for Git
Open SSH keygen
1. type or paste ssh-keygen -t rsa -b 4096 -C "your_github_email_here" to generate key
2. Follow the instructions in Git, or just press enter continuously
3. Navigate to c:\users\ur-name.ssh\id_rsa.pub, open file with notepad, and copy the whole thing in it

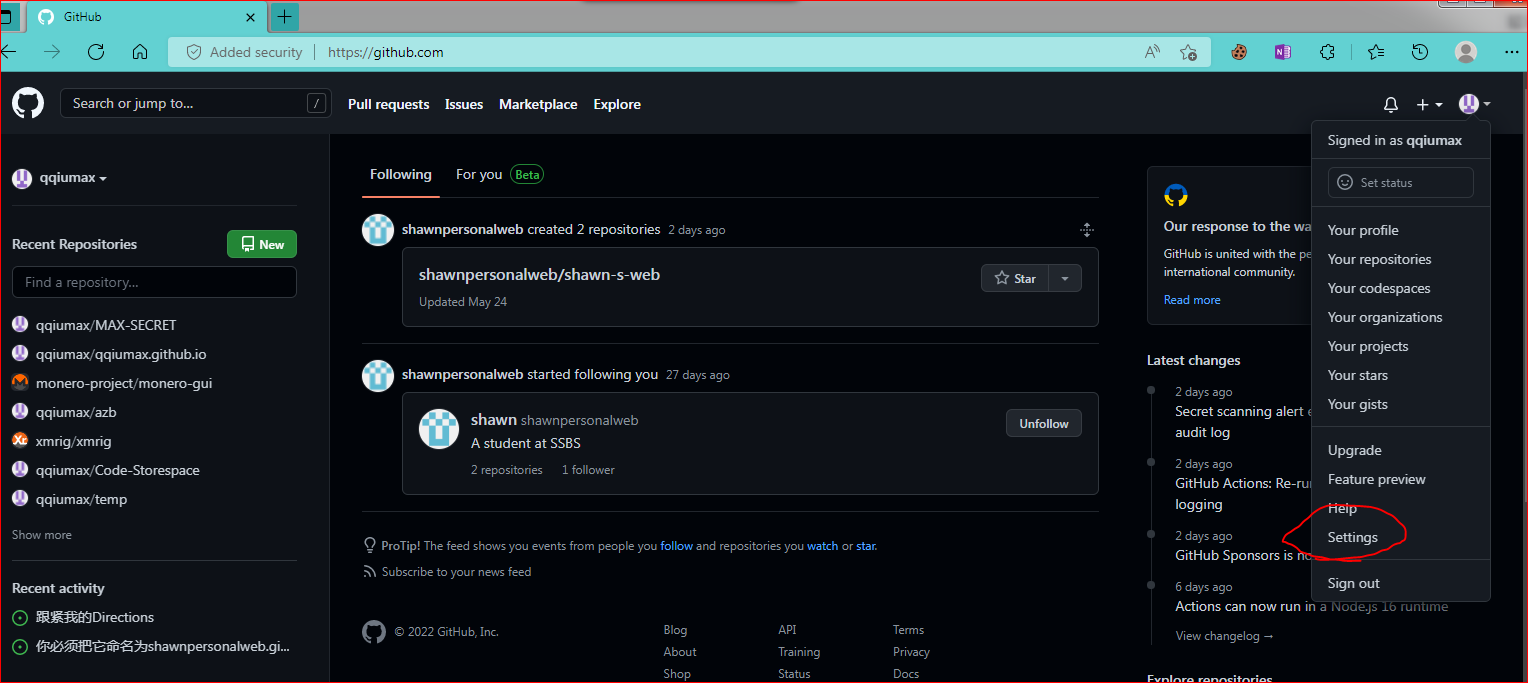
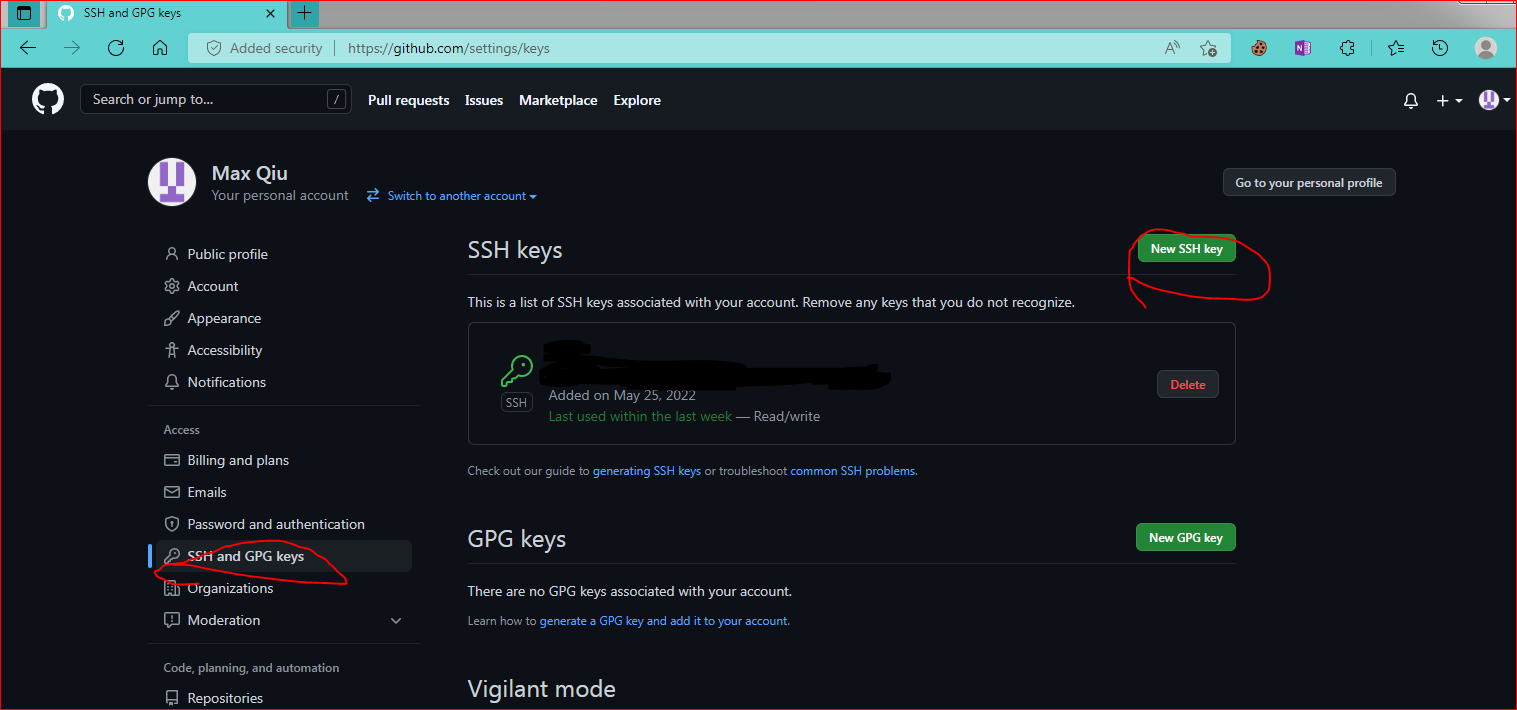
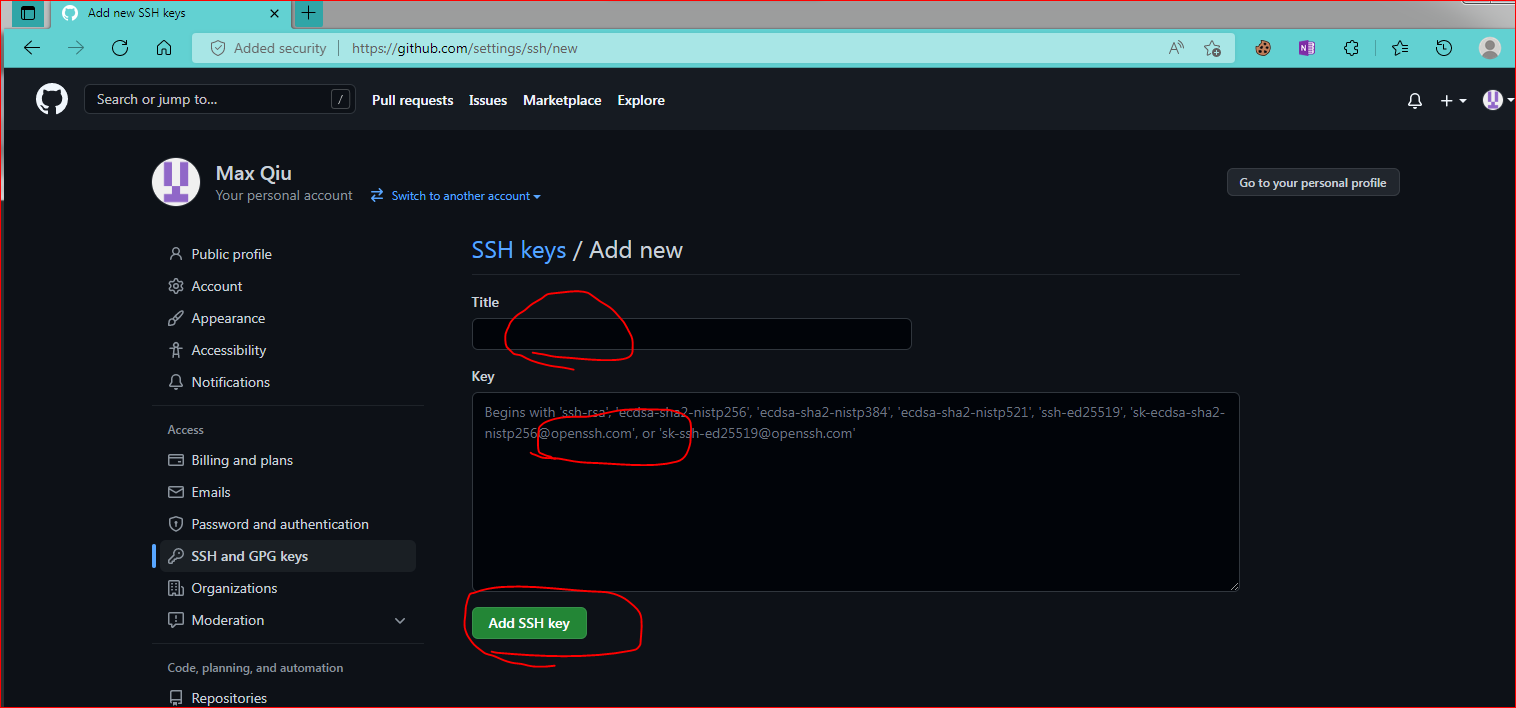
4. Open Github in yout browser, navigate to settings => SSH and GPG keys => new SSH key, and paste what you just copied. Should end with your email.


And you are done with your keys!
Initialize your local repository
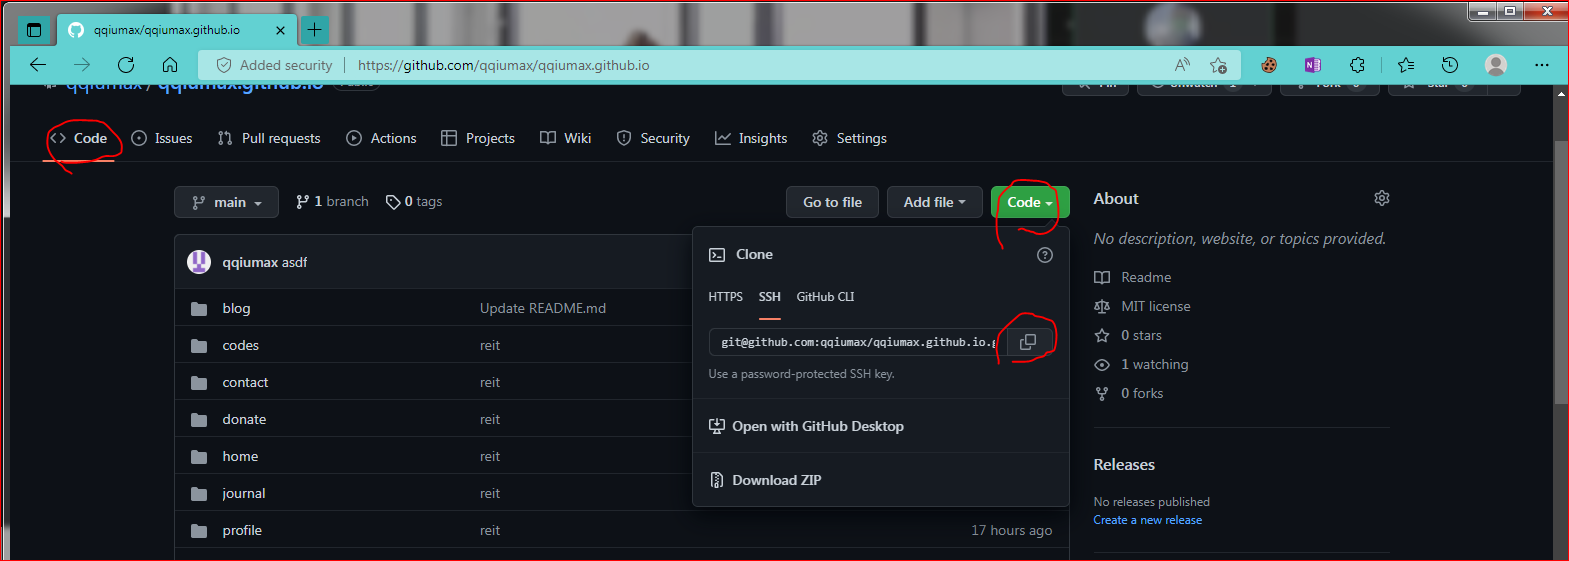
1. Open browser and go to github, find your repository that holds your blog, navigate to “code” tab and copy according to image.

2. Open git bash in a folder, type git clone and then paste the thing you just copied.
Upgrading blogs
Wait for a few second, close the bash, and you are done!
If you added or modified, open git bash, type
git add *
git commit -m "a_small_note_you_want_to_leave"
git push origin main
And you are done, you can also use git status to check too.
If you want to remove a file:
git rm "file_path_you_removed"
git commit -m "a_small_note_you_want_to_leave"
git push origin main
Errors While Pushing
Use git pull --rebase origin main and then push.
(Optional) GPG Signature key
1. Install the newest gpg signer for your system here
2.use gpg --full-generate-key in git bash.
3.press enter
4.press 4096
5.follow the directions
6.Make sure to write your sign-up email and username for github.
7.enter a secure password twice, following the directions.
8.enter gpg --list-secret-keys --keyid-format=long
9.copy the code in sec section after the / slash.
10.enter gpg --armor --export "your_copied_code"
11.copy the —-Begin … part until the —End.. part, inclusive.
12.Go to github => settings => ssh and gpg keys, add new GPG key, and paste it.
